Hexo 优化配置汇总【GitHub Actions 看板娘 数学公式 标签云 README 转义问题】

服务器 快到期了,这几天迁移到 GitHub 上,用免费的 GitHub Pages 重新部署下 杰森的博客 。以下样式及优化配置基于 Hexo,主题 Next

GitHub Actions 自动化部署

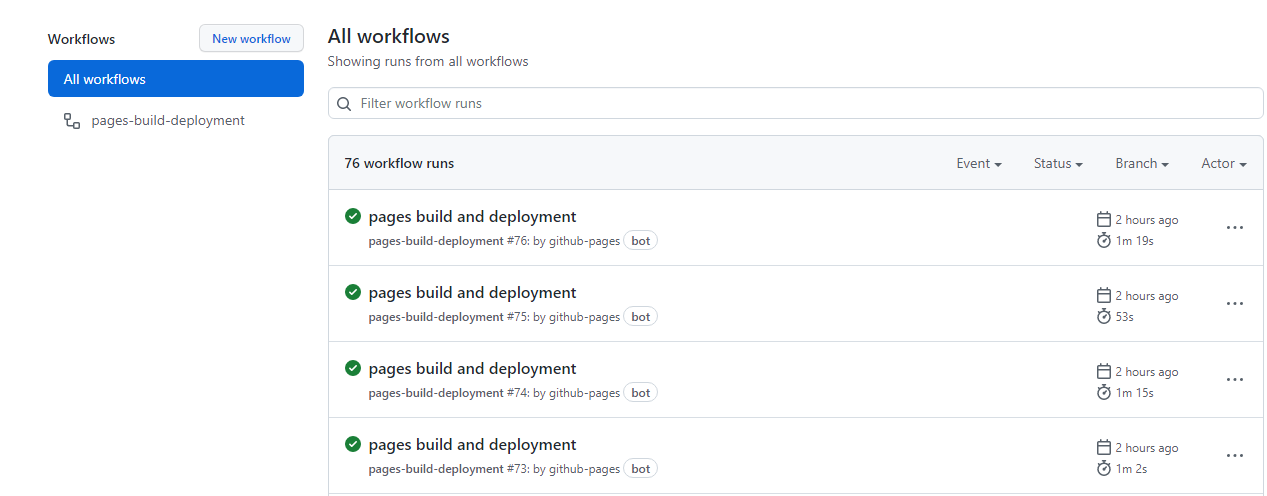
本文最具价值的配置莫过于此,没有用到 GitHub Actions 前,每次发文需要将 markdown 文件放入 _post 文件夹下,然后执行 hexo clean && hexo g && hexo s && hexo g一连串命令,执行无报错还好说,万一本地环境出现错误,还得花时间找错,非常麻烦

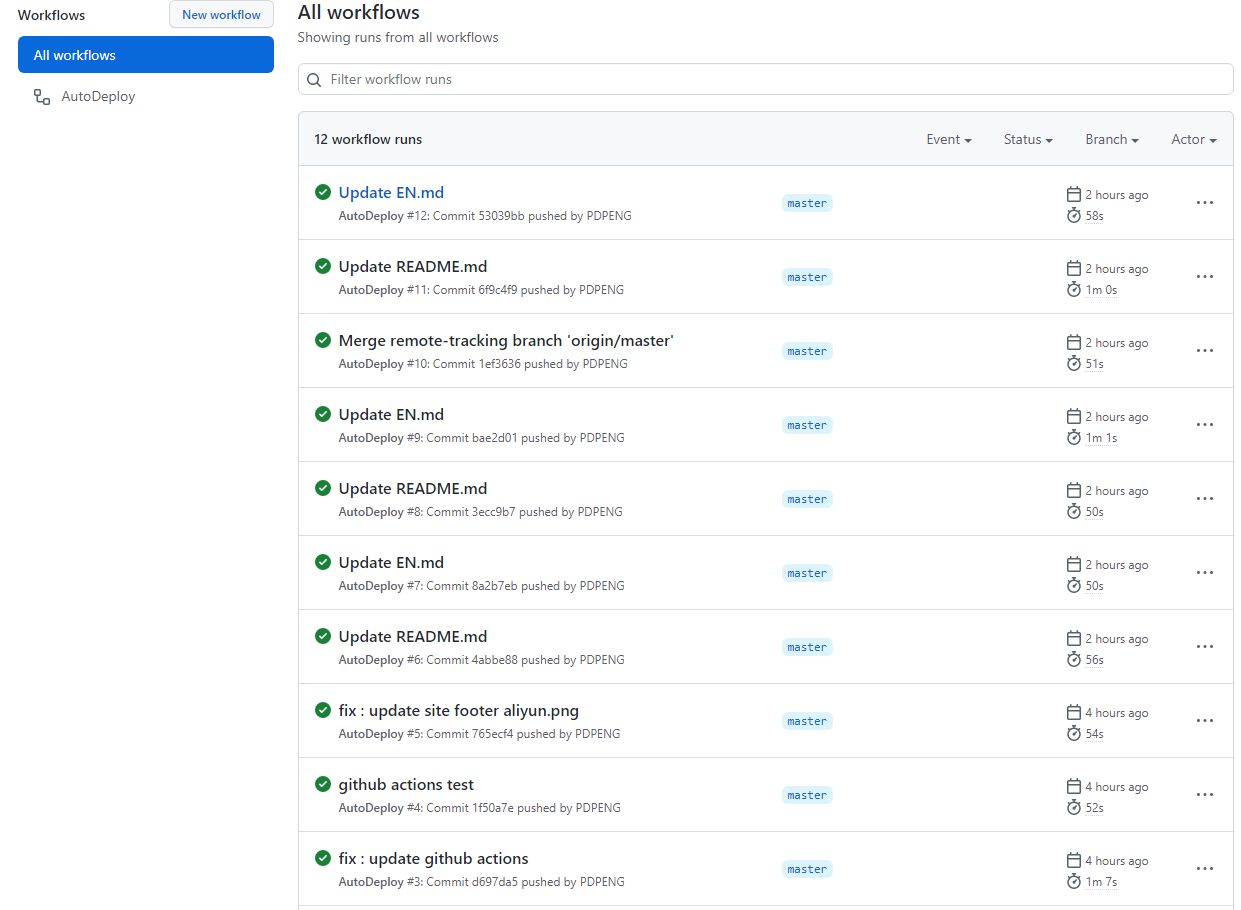
使用 GitHub Actions 后,发文只需要在博客的源文件仓库中拖拽源文件或者 push 源文件到仓库,GitHub Actions 即可监测仓库状态,自动执行部署操作到指定位置,不必担心本地环境出错等系列问题

效果 预览地址
有关介绍和详细令牌、密钥配置请 参考此处,以下主要是 .github/workflows/deploy.yml 文件 的配置

1
2
3
4
5
6
7
8
9
10
11
12
13
14
15
16
17
18
19
20
21
22
23
24
25
26
27
28
29
30
31
32
33
34
35
36
37
38
39
40
41
42
43
44
45
46
47
48
49
50
51
52
53
54
55
56
57
58
59
60
61
62
63
64
65
66
67
68
69
70
71
72
73
74
75
76
77
78
79
80
81
82
83
84
85
86
87
88
89
90
91
92
93
94
95
96
97
98
99
100
101
102
103
104
105
106
# Action's Name
name: AutoDeploy

on:
# Triggering Condition 1 Main Branch Performs The Task After Receiving Push
push:
branches:
- master
# Triggering Condition 2 Manual Button
workflow_dispatch:

# Putting Environment Variables Here You Need To Replace It With Your Own
env:
# After Hexo Compiles Use This Git User To Deploy To The Github Warehouse
GIT_USER: PDPENG
# After Hexo Compiles Use This Git Mailbox To Deploy To The Github Warehouse
GIT_EMAIL: jason.peng.code@gmail.com
# The Git Hub Warehouse To Be Deployed After Hexo Compiles
GIT_DEPLOY_REPO: PDPENG/pdpeng.github.io
# Hexo Compiles The Branch To Deploy After Compilation
GIT_DEPLOY_BRANCH: master

# After Hexo Compiles Use This Gitee User To Deploy To The Gitee Warehouse
GITEE_USER: Coder-Jason
# The Gitee Warehouse To Be Deployed After Hexo Compiles
GITEE_DEPLOY_REPO: Coder-Jason/Coder-Jason
# Hexo Compiles The Branch To Deploy After Compilation
GITEE_DEPLOY_BRANCH: master

# Pay Attention To Replacing Your Github Source Warehouse Address
GIT_SOURCE_REPO: git@github.com:PDPENG/pdpeng.github.io.git
# Pay Attention To Replacement To Your Gitee Target Warehouse Address
GITEE_DESTINATION_REPO: git@gitee.com:Coder-Jason/coder-jason.git

jobs:
build:
name: Build on node ${{ matrix.node_version }} and ${{ matrix.os }}
runs-on: ubuntu-latest
if: github.event.repository.owner.id == github.event.sender.id
strategy:
matrix:
os: [ubuntu-latest]
node_version: [16.x]

steps:
- name: Checkout
uses: actions/checkout@v2

- name: Checkout deploy repo
uses: actions/checkout@v2
with:
repository: ${{ env.GIT_DEPLOY_REPO }}
ref: ${{ env.GIT_DEPLOY_BRANCH }}
path: .deploy_git

- name: Use Node.js ${{ matrix.node_version }}
uses: actions/setup-node@v1
with:
node-version: ${{ matrix.node_version }}

- name: Configuration environment
env:
HEXO_DEPLOY_PRI: ${{secrets.HEXO_DEPLOY_PRI}}
run: |
sudo timedatectl set-timezone "Asia/Shanghai"
mkdir -p ~/.ssh/
echo "$HEXO_DEPLOY_PRI" > ~/.ssh/id_rsa
chmod 600 ~/.ssh/id_rsa
ssh-keyscan -t rsa github.com >> ~/.ssh/known_hosts
ssh-keyscan -t rsa gitee.com >> ~/.ssh/known_hosts
git config --global user.name $GIT_USER
git config --global user.email $GIT_EMAIL

- name: Install dependencies
run: |
npm install hexo-cli -g
# Install According To The Components You Installed
npm install - gulp gulp-uglify hexo hexo-deployer-git hexo-generator-archive hexo-generator-category hexo-generator-feed hexo-generator-index hexo-generator-search hexo-generator-searchdb hexo-generator-sitemap hexo-generator-tag hexo-leancloud-counter-security hexo-renderer-ejs hexo-renderer-marked hexo-renderer-pug hexo-renderer-stylus hexo-server hexo-tag-cloud hexo-word-counter readable-stream uglify-es --save

- name: Deploy hexo
run: |
npm run deploy

# The Following Is The Release To Gitee
- name: Sync to Gitee
uses: wearerequired/git-mirror-action@master
env:
# Using Hexo Deploy Pri Directly
SSH_PRIVATE_KEY: ${{ secrets.HEXO_DEPLOY_PRI }}
with:
# GitHub Source Warehouse Address
source-repo: ${{ env.GIT_SOURCE_REPO }}
# Gitee Target Warehouse Address
destination-repo: ${{ env.GITEE_DESTINATION_REPO }}

- name: Build Gitee Pages
uses: yanglbme/gitee-pages-action@main
with:
# Your Gitee Username
gitee-username: ${{ env.GITEE_USER }}
# Note At Settings Secrets Configuration Gitee Password
gitee-password: ${{ secrets.GITEE_PASSWORD }}
# Your Gitee Warehouse The Warehouse Name Is Strictly Distinguished Please Fill In It Accurately Otherwise There Will Be An Error
gitee-repo: ${{ env.GITEE_DEPLOY_REPO }}
# To Deploy Branches The Default Is Master If It Is Other Branches You Need To Specify The Specified Branch Must Exist
branch: ${{ env.GITEE_DEPLOY_BRANCH }}

在配置完令牌及密钥后,可以直接复制 该文件 使用,如果仅需要同步 Github,则不必配置 Gitee 同步字段配置

杰森的仓库分布是

1
2
https://github.com/PDPENG/MyBlog 私有仓库 (actions 部署位置)
https://github.com/PDPENG/pdpeng.github.io 公共仓库 (actions 部署后推送的位置)

配置完成后,GitHub Actions 一旦检测到 MyBlog 仓库下的变动后,将会自动部署至 pdpeng.github.io 仓库
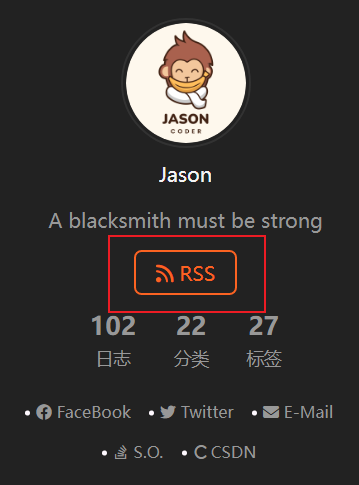
RSS 订阅按钮

这里默认您已经添加了 RSS 相关插件,站点已具备生成 atom.xml 文件能力

效果图,预览地址

将下面的代码

1
2
3
4
5
6
7
8
9
10
11
12
13
14
15
16
17
18
19
20
21
22
23
24
25
26
27
28
29
30
31
32
33
34
35
36
37
38
<html>
<head>
<style>
.rss-button div {
display: block;
margin-top: 5px;
background-color: transparent;
position: relative;
font-family: 'Lato', "PingFang SC", "Microsoft YaHei", sans-serif;
font-size: 14px;
line-height: 2;
}

.feed-link a {
display: inline-block;
padding: 0 15px;
color: #fc6423;
border: 2px solid #fc6423;
border-radius: 6px;
text-decoration: none;
}

.feed-link a:hover {
background-color: #fc6423;
border-bottom-color: #fc6423;
color: #fff;
}
</style>
</head>

<body class="rss-button">
<div class="feed-link" title="RSS → /atom.xml">
<a href="/atom.xml">
<i class="fa fa-rss"> </i> RSS
</a>
</div>
</body>
</html>

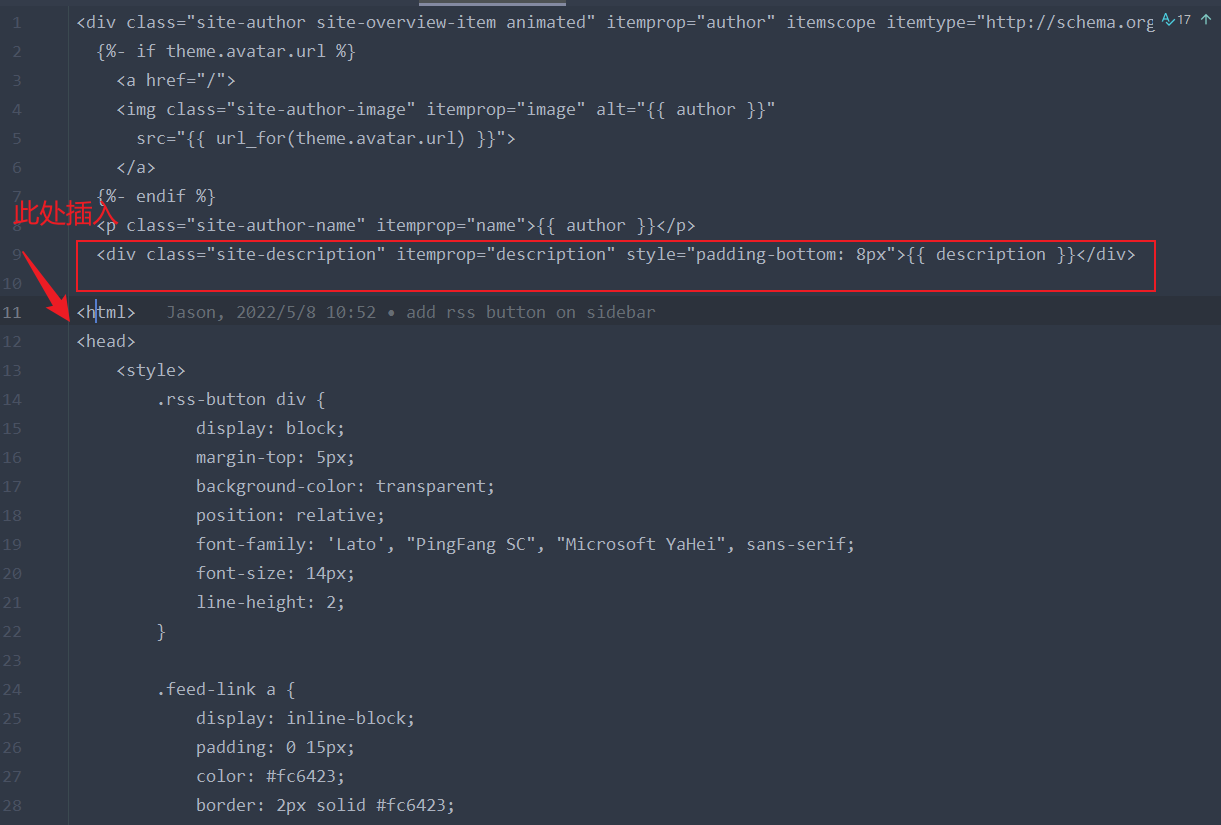
插入到 MyBlog\themes\next\layout\_partials\sidebar\site-overview.njk 文件图示位置中
社交图标加入 CSDN

效果图,预览地址

Next 最新版的主题,没有找到引用阿里巴巴图标库的方法(总提示请求无效),如果你有不错的解决方案,欢迎评论区留言

这里给出一个和 CSDN 比较类似的图标

1
2
social:
CSDN: https://blog.csdn.net/m0_51269961 || fa-solid fa-c

点击头像返回主页效果

这个比较简单,在头像的位置添加 <a></a> 标签就好。可能定位比较麻烦,文件位置是 MyBlog\themes\next\layout\_partials\sidebar\site-overview.njk

1
2
3
4
5
6
{%- if theme.avatar.url %}
<a href="/">
<img class="site-author-image" itemprop="image" alt="{{ author }}"
src="{{ url_for(theme.avatar.url) }}">
</a>
{%- endif %}

删除社交链接底部横线

效果图,预览地址


文件位置是MyBlog\themes\next\source\css\_schemes\Muse\_sidebar.styl ,找到 a 标签的 css 样式,添加 border-bottom 0px; 即可

加入看板娘

效果图,预览地址

如果你的站点开启了侧边栏 始终显示,在进行下述操作后,请隐藏侧边栏后查看效果

图示路径下

加入这段代码

1
<script src="/live2d-widget/autoload.js"></script>

然后在主题配置文件末尾加入下列配置项

1
2
3
# 自定义看板娘 https://github.com/PDPENG/live2d-widget
live2d:
enable: true

效果即可显示


如果你需要更高级的自定义,可继续完成下面的配置

切换到主题的 source 文件夹下,克隆项目到本地(删除项目 .git 文件,避免推送报错),项目地址

1
git clone https://github.com/stevenjoezhang/live2d-widget

*注意:live2d_path 参数应使用 绝对路径

更多自定义配置参见,live2d-widget 自定义配置


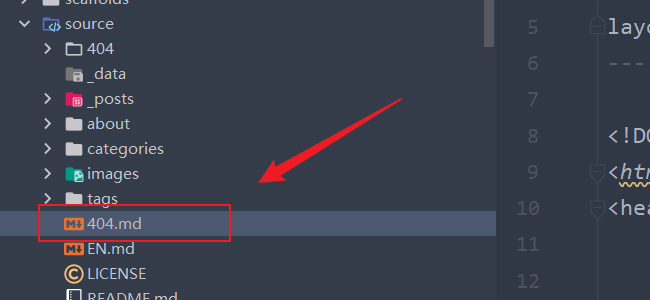
自定义 404 页面

效果图,预览地址
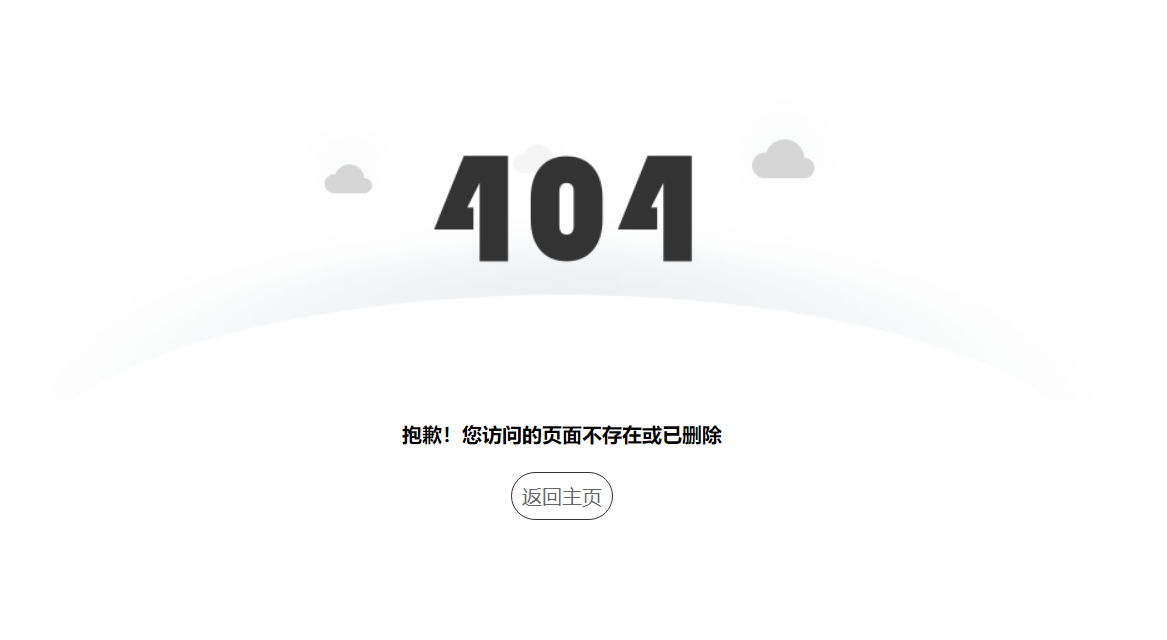
之前部署在服务器时,站点是配置了 404 页面的,但是在 Github Pages 中只有访问 /404 时,才能定向到页面,并不能实现真正的 404 效果

查看了官方文档后,实现也比较容易,只需要在站点资源文件夹(source 目录下)添加 404.md404.html 即可

下面放上杰森的页面配置,供大家参考

1
2
3
4
5
6
7
8
9
10
11
12
13
14
15
16
17
18
19
20
21
22
23
24
25
26
27
28
29
30
31
32
33
34
35
36
37
38
39
40
41
42
43
44
45
46
47
48
49
50
51
52
53
54
55
56
57
58
59
60
61
62
63
64
65
66
67
68
69
70
71
72
73
74
75
76
77
78
79
80
81
82
83
84
85
86
87
88
89
90
91
92
93
94
95
96
97
98
99
100
101
102
103
104
105
106
107
108
109
110
111
112
113
114
115
116
117
118
119
120
121
122
123
124
125
126
127
128
129
130
131
132
133
134
135
136
137
138
139
140
141
142
143
144
145
146
147
148
149
---
title: 404
date: 2022-01-29 18:14:03
comments: false
layout: false
---

<!DOCTYPE html>
<html>
<head>
<meta charset="UTF-8">
<title>页面走丢啦~</title>
<link rel="shortcut icon" href="/images/favicon-32x32.png" type=image/x-icon>
</head>
<style type="text/css">
.error{
position: absolute;
top:50%;
margin-top:-250px;
width:100%;
height:400px;
/*border:1px solid red;*/
overflow: hidden;
}
.error img{
display: block;
margin:0 auto;
}
.error p{
text-align: center;
font-size: 16px ! important;
font-weight: 600
}
.back{
display: block;
width:80px;
text-align: center;
margin:20px auto;
padding:8px 0;
border:1px solid #333;
border-radius: 100px;
cursor: pointer;
text-decoration: none;
color: #666;
}
.back:hover{
color:#fff;
background: #000000;
border:0px solid #333;
}

/* base.css */

body,html{
height: 100%;
width: 100%;
min-width: 950px;
}

html,body,div,span,applet,object,iframe,h1,h2,h3,h4,h5,h6,p,blockquote,pre,a,abbr, acronym,address,big,cite,code,del,dfn,em,font,img,ins,kbd,q,s,samp,small,strike, sub,sup,tt,var,u,i,center,dl,dt,dd,ol,ul,li,fieldset,form,label,legend,table,caption, tbody,tfoot,thead,tr,th,tdp,span{
align:baseline;
background:transparent;
margin: 0;
padding:0;
-moz-box-sizing:border-box; /* Firefox */
-webkit-box-sizing:border-box; /* Safari */
box-sizing:border-box;
list-style-type:none;
font-family: Microsoft YaHei,microsoft yahei ui,微软雅黑,SimSun,楷体,楷体_GB2312;
font-size: 13px;
}

option,input,button,select,textarea{
border:0;
outline:none;
appearance:none;
-moz-appearance:none;
-webkit-appearance:none;
background: none;
webkit-appearance: none;
background:none;
}
body, td, div,span,a{
line-height:1;
letter-spacing:0;
margin:0;
padding:0;
-moz-font-smoothing:antialiased;
-webkit-font-smoothing: antialiased;
font-smoothing:antialiased;
}
blockquote,q{
quotes:none;
}
blockquote:before,blockquote:after,q:before,q:after{
content:none;
}
:focus{
outline:0;
}
ins{
text-decoration:none;
}
del{
text-decoration:line-through;
}
table{
border-collapse:collapse;
border-spacing:0;
}

img{
border:0px;
}
.banner{
width: 1004px;
height:232px;
margin: 10px auto 0 auto;
border-radius: 6px;
overflow: hidden;
}
.banner img{
width: 100%;
}
a{
text-decoration:none;
cursor:pointer;
outline:none;
text-decoration-line: none;
color:#666;
}
a, area {
outline:none;
blr:expression(this.onFocus=this.blur())
}
a:hover{
text-decoration:none;
}

</style>

<body>
<div class="error">
<img src="/images/404.png">
<p>抱歉!您访问的页面不存在或已删除</p>
<a class="back" href="/">返回主页</a>
</div>
</body>
</html>

数学公式支持

效果图,预览地址

主题配置文件中,该字段配置,详情参考 Math Equations

1
2
3
4
5
6
7
8
9
10
11
12
13
14
15
16
17
18
19
# Math Formulas Render Support
# Warning: Please install / uninstall the relevant renderer according to the documentation.
# See: https://theme-next.js.org/docs/third-party-services/math-equations
# Server-side plugin: https://github.com/next-theme/hexo-filter-mathjax
math:
# Default (false) will load mathjax / katex script on demand.
# That is it only render those page which has `mathjax: true` in front-matter.
# If you set it to true, it will load mathjax / katex script EVERY PAGE.
every_page: false

mathjax:
enable: true
# Available values: none | ams | all
tags: none

katex:
enable: true
# See: https://github.com/KaTeX/KaTeX/tree/master/contrib/copy-tex
copy_tex: true

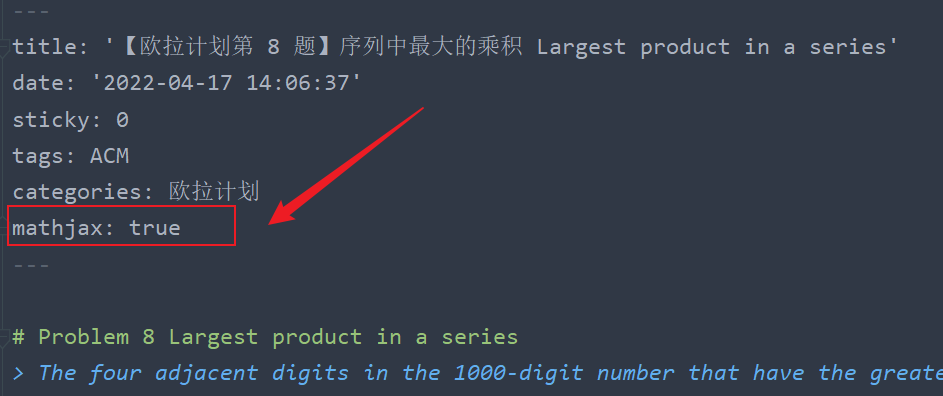
如依照上述配置,日后发文请在需要加载数学公式渲染文章的 front-matter 处添加 mathjax: true。例如
本地搜索功能排错指南

效果图,预览地址
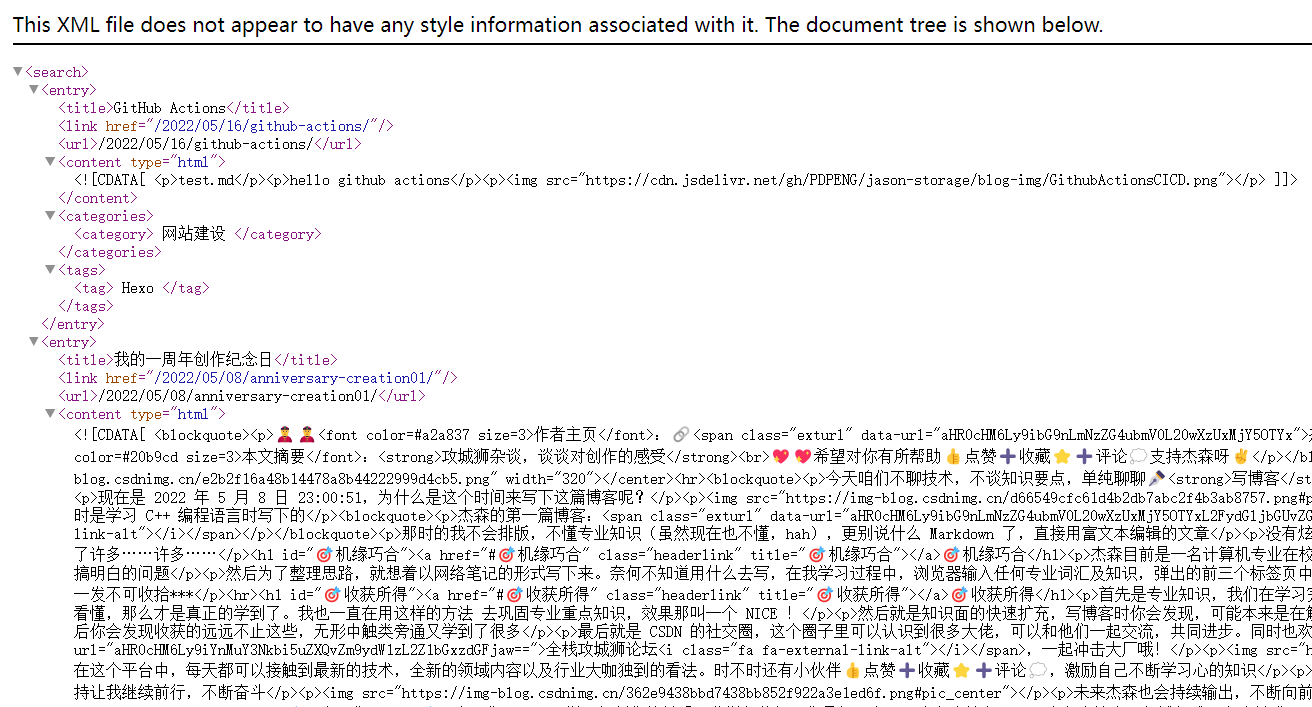
部署完成后,发现本地搜索功能失效,直接 访问站点 search.xml 浏览器显示

这里在保证插件配置正常的前提下,给出排除字符错误的解决方案

我们将 search.xml 保存到本地用 vscode 打开,根据浏览器报错的行、列指示,发现字符转义错误。在文章页面下删除该类字符后重新部署,搜索功能恢复

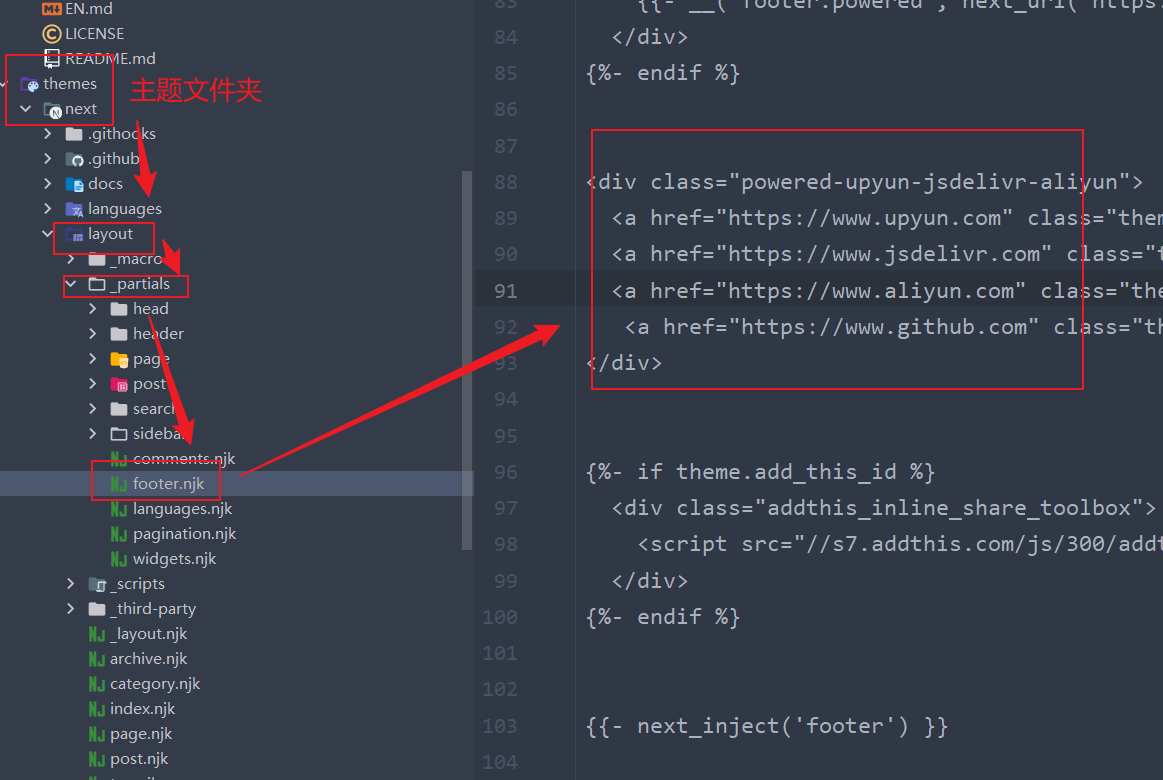
自定义站点页脚

效果图,预览地址

路径如图,按需修改
加入标签云

效果图,预览地址

  • 进入到 hexo 的根目录,然后在 package.json 中添加依赖: "hexo-tag-cloud": "2.1.*"
  • 然后执行 npm install 命令

打开路径 next/layout/_macro/sidebar.swig,添加如下配置

1
2
3
4
5
6
7
8
9
10
11
{% if site.tags.length > 1 %}
<script type="text/javascript" charset="utf-8" src="{{ url_for('/js/tagcloud.js') }}"></script>
<script type="text/javascript" charset="utf-8" src="{{ url_for('/js/tagcanvas.js') }}"></script>
<div class="widget-wrap">
<div id="myCanvasContainer" class="widget tagcloud">
<canvas width="250" height="250" id="resCanvas" style="width:100%">
{{ list_tags() }}
</canvas>
</div>
</div>
{% endif %}
  • 完成安装和显示,可以通过 hexo clean && hexo g && hexo s 来进行本地预览, hexo clean 为必须选项。
  • *注:不要使用 hexo g -d 或者 hexo d -g 这类组合命令,详见

项目地址及详细教程参考

README 转义问题

效果图,预览地址
当我们为项目配置 README.md 文件时,发布后会发现文件会被 hexo 转义成 .html 文件,详见 Hexo 配置

这里以站点添加中英双语介绍文件为例,将项目 README.mdEN.md 放在 source 目录下

然后在图示位置根据 glob 语法规则添加值即可
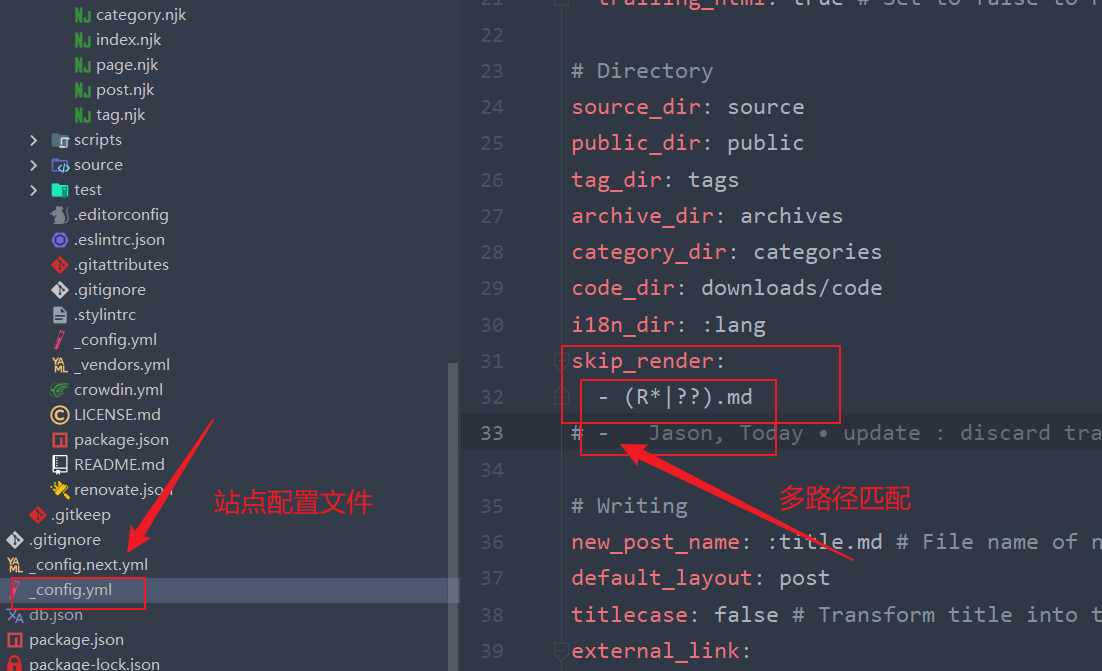
这样 hexo 就不会渲染匹配到的文件,显示正常


参考资料:

  • GitHub Actions 自动部署 Hexo 01
  • GitHub Actions 自动部署 Hexo 02
  • Actions yml 文件示例
  • GitHub Actions 入门教程
  • CDN 方式添加看板娘 live2d-widget
  • 本地搜索失效终极解决方案
  • 命令行通配符教程
  • Glob 语法及解析
  • #extended-globbing