Hexo 优化配置汇总【GitHub Actions 看板娘 数学公式 标签云 README 转义问题】
服务器 快到期了,这几天迁移到
GitHub上,用免费的GitHub Pages重新部署下 杰森的博客 。以下样式及优化配置基于Hexo,主题Next
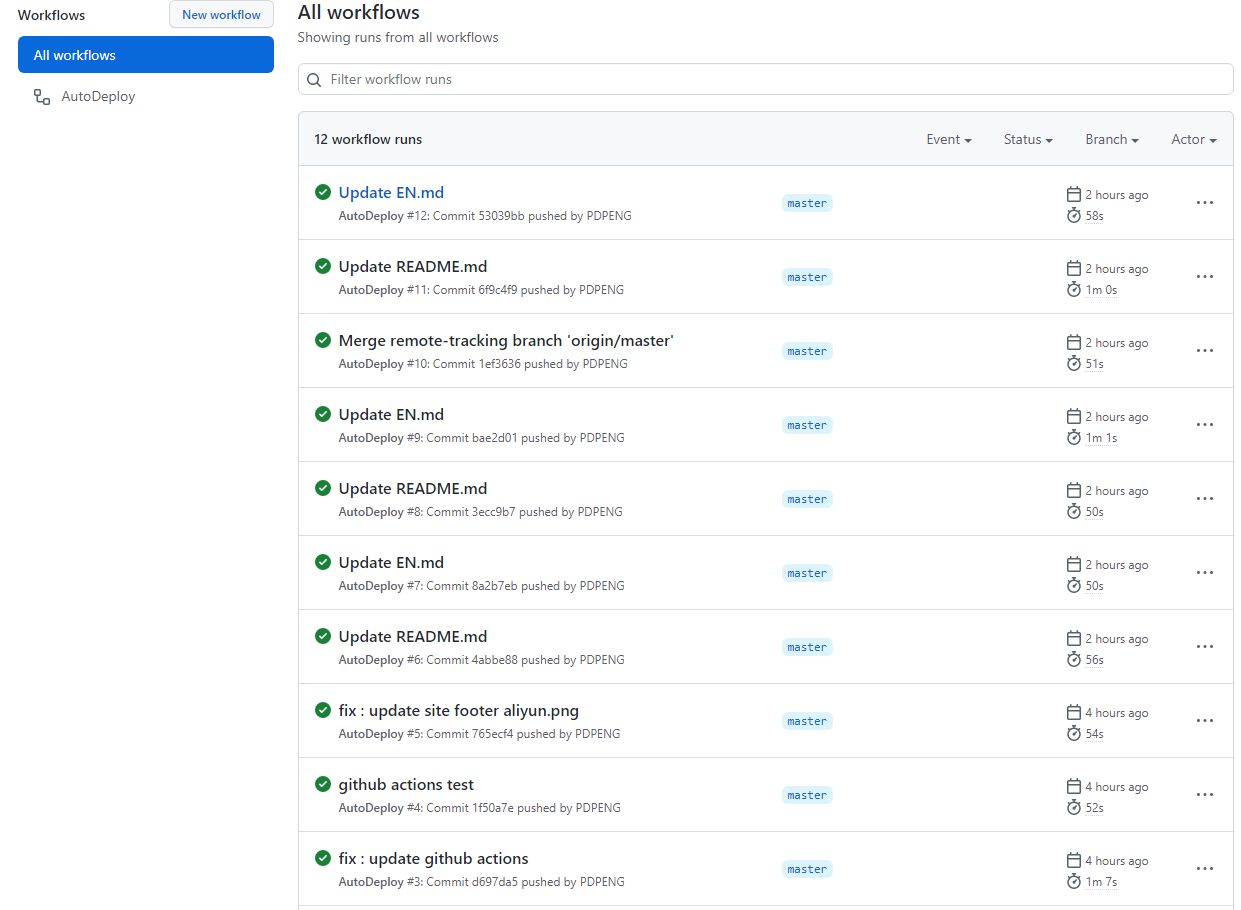
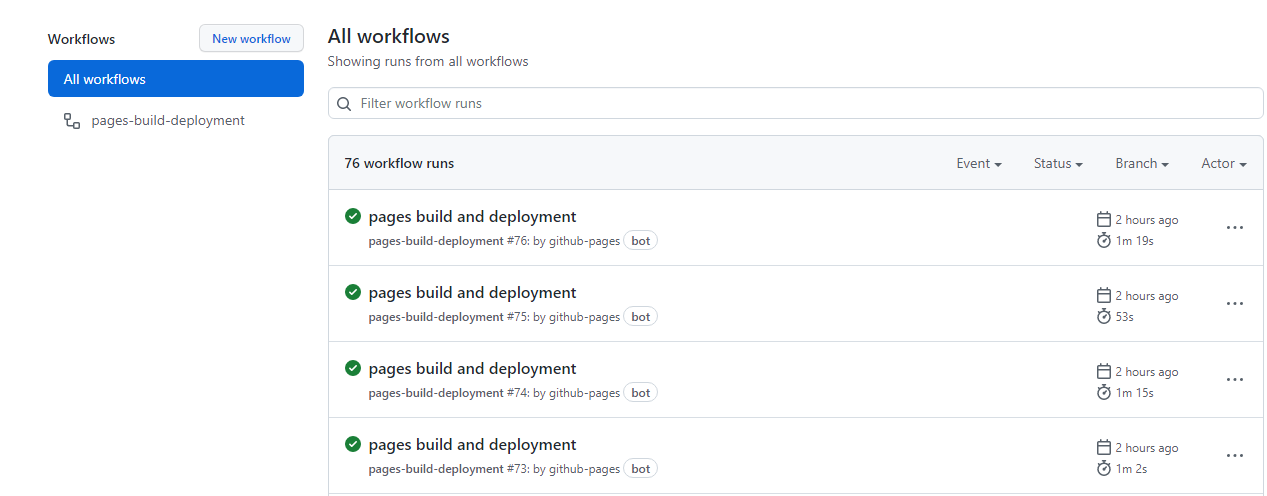
GitHub Actions 自动化部署

本文最具价值的配置莫过于此,没有用到 GitHub Actions 前,每次发文需要将 markdown 文件放入 _post 文件夹下,然后执行 hexo clean && hexo g && hexo s && hexo g一连串命令,执行无报错还好说,万一本地环境出现错误,还得花时间找错,非常麻烦
使用 GitHub Actions 后,发文只需要在博客的源文件仓库中拖拽源文件或者 push 源文件到仓库,GitHub Actions 即可监测仓库状态,自动执行部署操作到指定位置,不必担心本地环境出错等系列问题
效果 预览地址
有关介绍和详细令牌、密钥配置请 参考此处,以下主要是 .github/workflows/deploy.yml 文件 的配置
1 | # Action's Name |
在配置完令牌及密钥后,可以直接复制 该文件 使用,如果仅需要同步 Github,则不必配置 Gitee 同步字段配置
杰森的仓库分布是
1 | https://github.com/PDPENG/MyBlog 私有仓库 (actions 部署位置) |
配置完成后,GitHub Actions 一旦检测到 MyBlog 仓库下的变动后,将会自动部署至 pdpeng.github.io 仓库
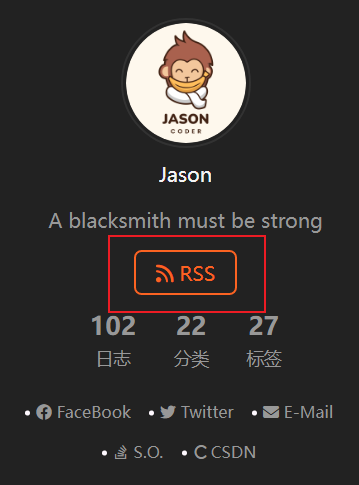
RSS 订阅按钮
这里默认您已经添加了
RSS相关插件,站点已具备生成atom.xml文件能力
效果图,预览地址
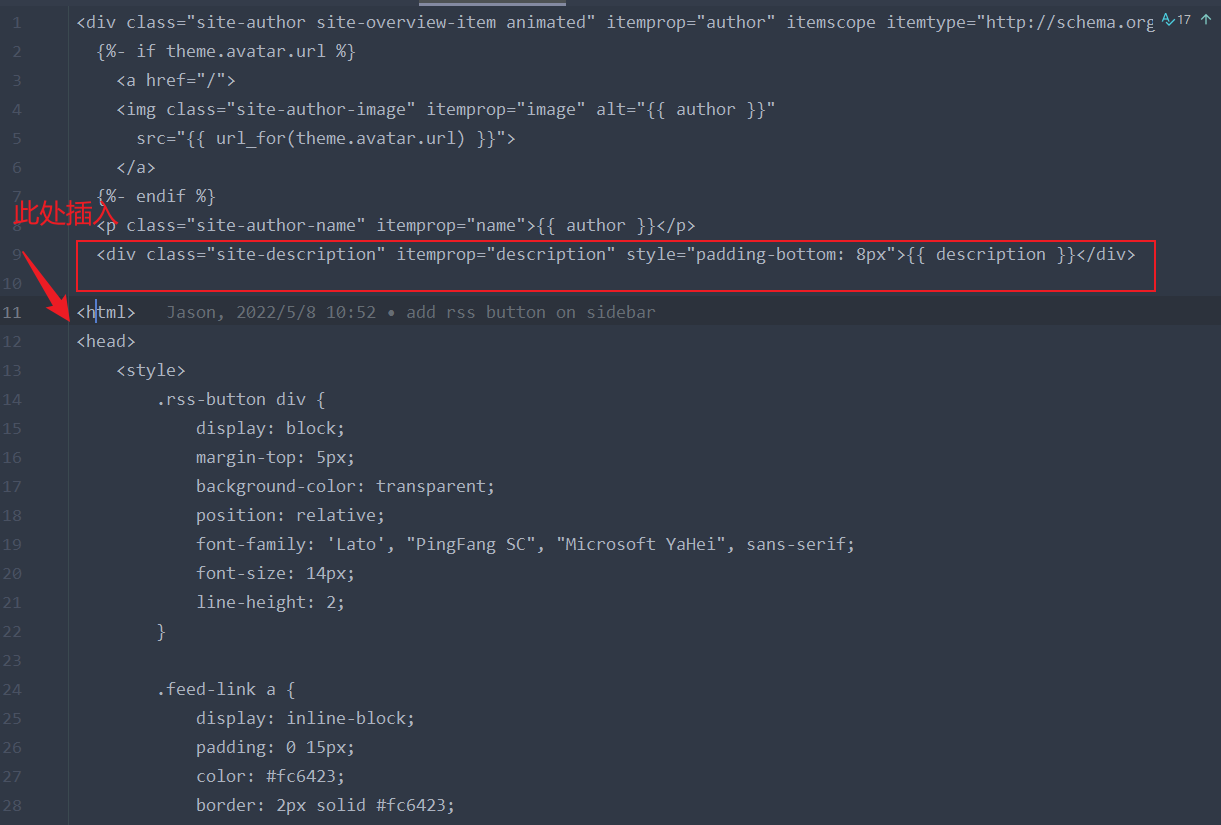
将下面的代码
1 | <html> |
插入到 MyBlog\themes\next\layout\_partials\sidebar\site-overview.njk 文件图示位置中
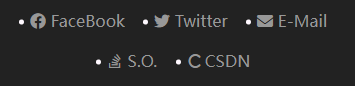
社交图标加入 CSDN
效果图,预览地址
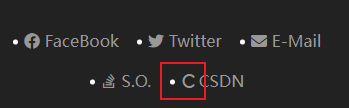
Next 最新版的主题,没有找到引用阿里巴巴图标库的方法(总提示请求无效),如果你有不错的解决方案,欢迎评论区留言
这里给出一个和 CSDN 比较类似的图标
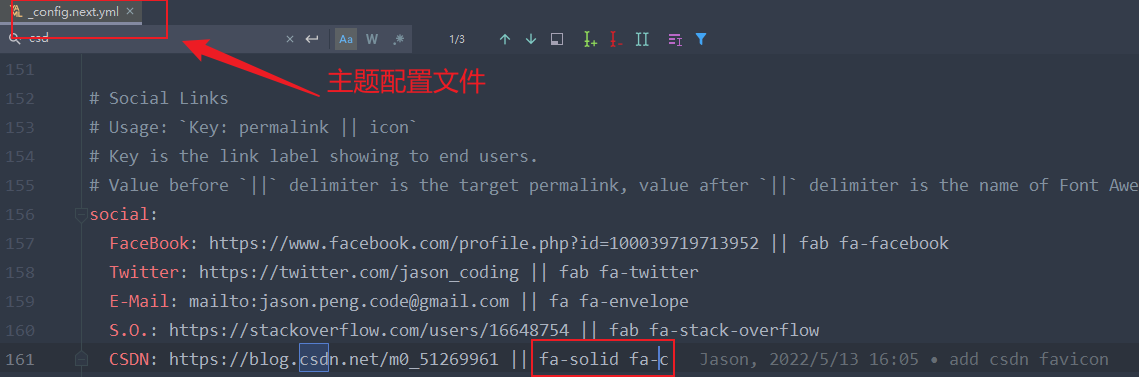
1 | social: |
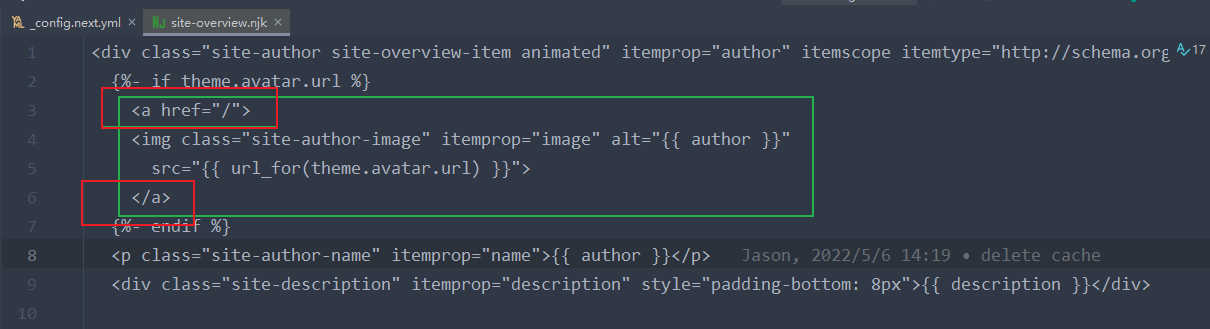
点击头像返回主页效果
这个比较简单,在头像的位置添加 <a></a> 标签就好。可能定位比较麻烦,文件位置是 MyBlog\themes\next\layout\_partials\sidebar\site-overview.njk
1 | {%- if theme.avatar.url %} |
删除社交链接底部横线
效果图,预览地址
文件位置是MyBlog\themes\next\source\css\_schemes\Muse\_sidebar.styl ,找到 a 标签的 css 样式,添加 border-bottom 0px; 即可

加入看板娘
效果图,预览地址
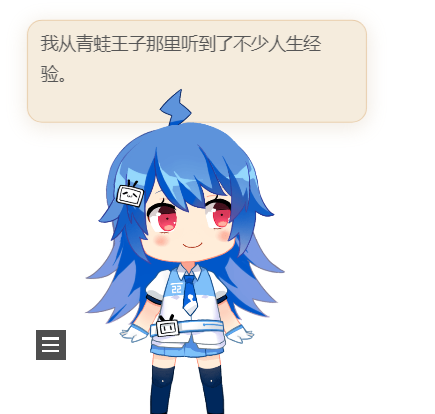
如果你的站点开启了侧边栏 始终显示,在进行下述操作后,请隐藏侧边栏后查看效果
图示路径下
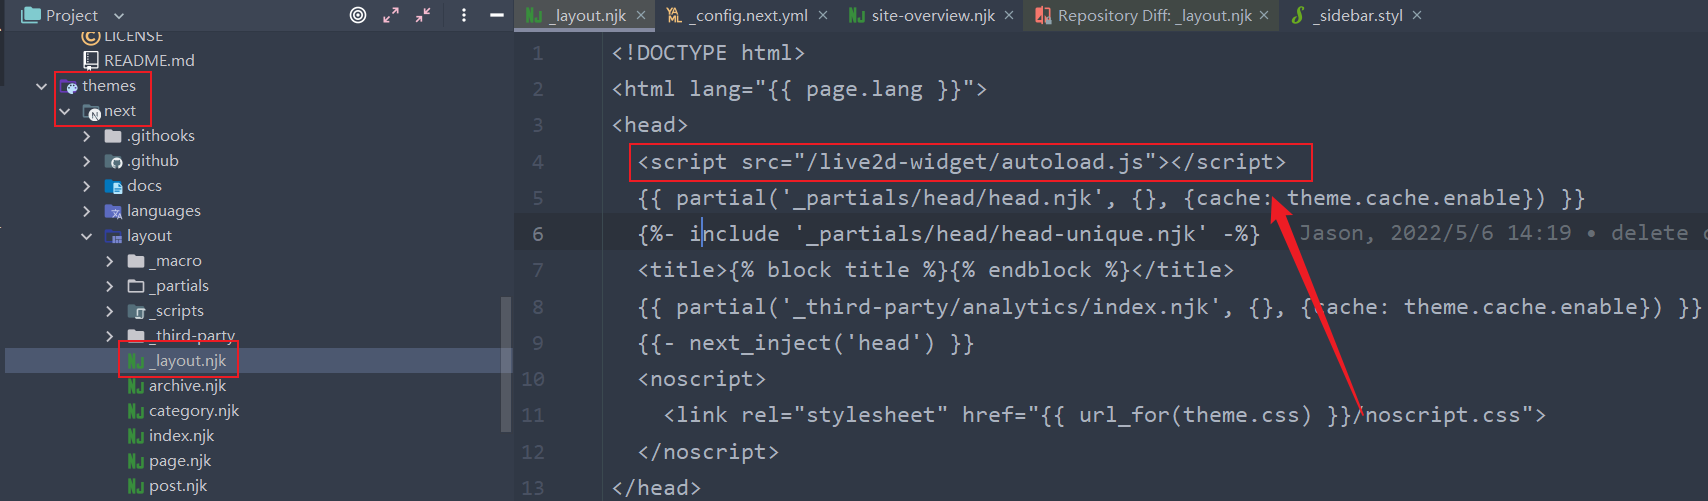
加入这段代码
1 | <script src="/live2d-widget/autoload.js"></script> |
然后在主题配置文件末尾加入下列配置项
1 | # 自定义看板娘 https://github.com/PDPENG/live2d-widget |
效果即可显示
如果你需要更高级的自定义,可继续完成下面的配置
切换到主题的 source 文件夹下,克隆项目到本地(删除项目 .git 文件,避免推送报错),项目地址
1 | git clone https://github.com/stevenjoezhang/live2d-widget |
*注意:live2d_path 参数应使用 绝对路径
更多自定义配置参见,live2d-widget 自定义配置
自定义 404 页面
效果图,预览地址
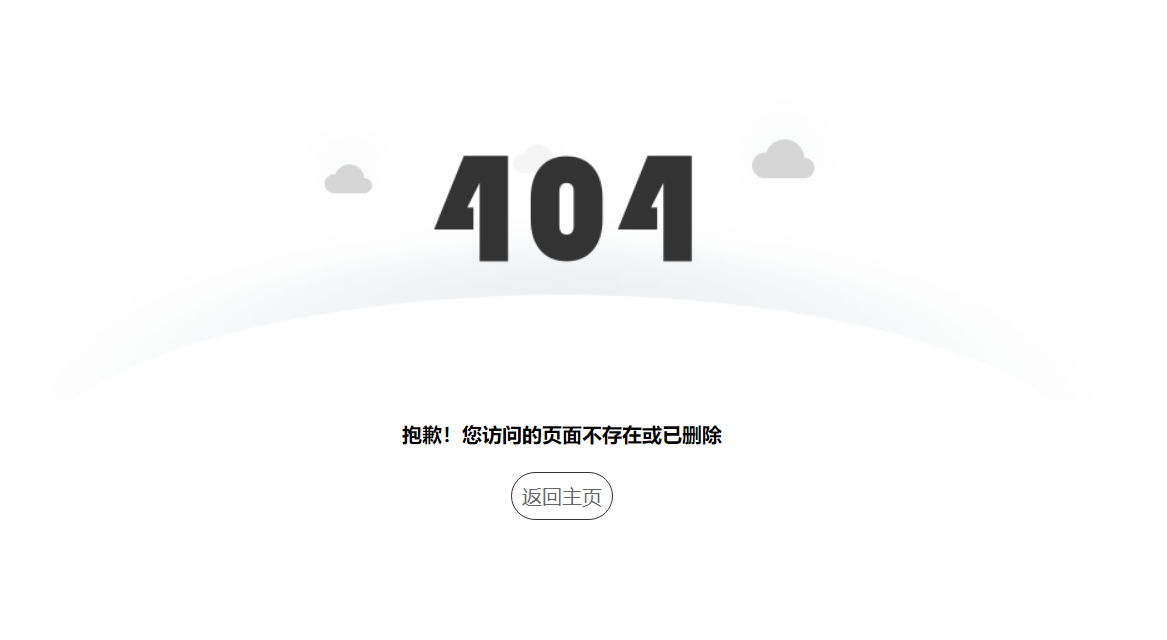
之前部署在服务器时,站点是配置了 404 页面的,但是在 Github Pages 中只有访问 /404 时,才能定向到页面,并不能实现真正的 404 效果
查看了官方文档后,实现也比较容易,只需要在站点资源文件夹(source 目录下)添加 404.md 或 404.html 即可

下面放上杰森的页面配置,供大家参考
1 | --- |
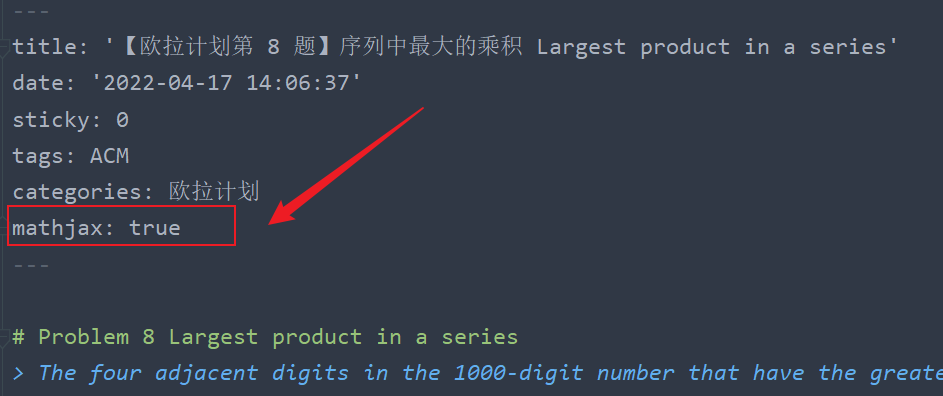
数学公式支持
效果图,预览地址
主题配置文件中,该字段配置,详情参考 Math Equations
1 | # Math Formulas Render Support |
如依照上述配置,日后发文请在需要加载数学公式渲染文章的 front-matter 处添加 mathjax: true。例如
本地搜索功能排错指南
效果图,预览地址
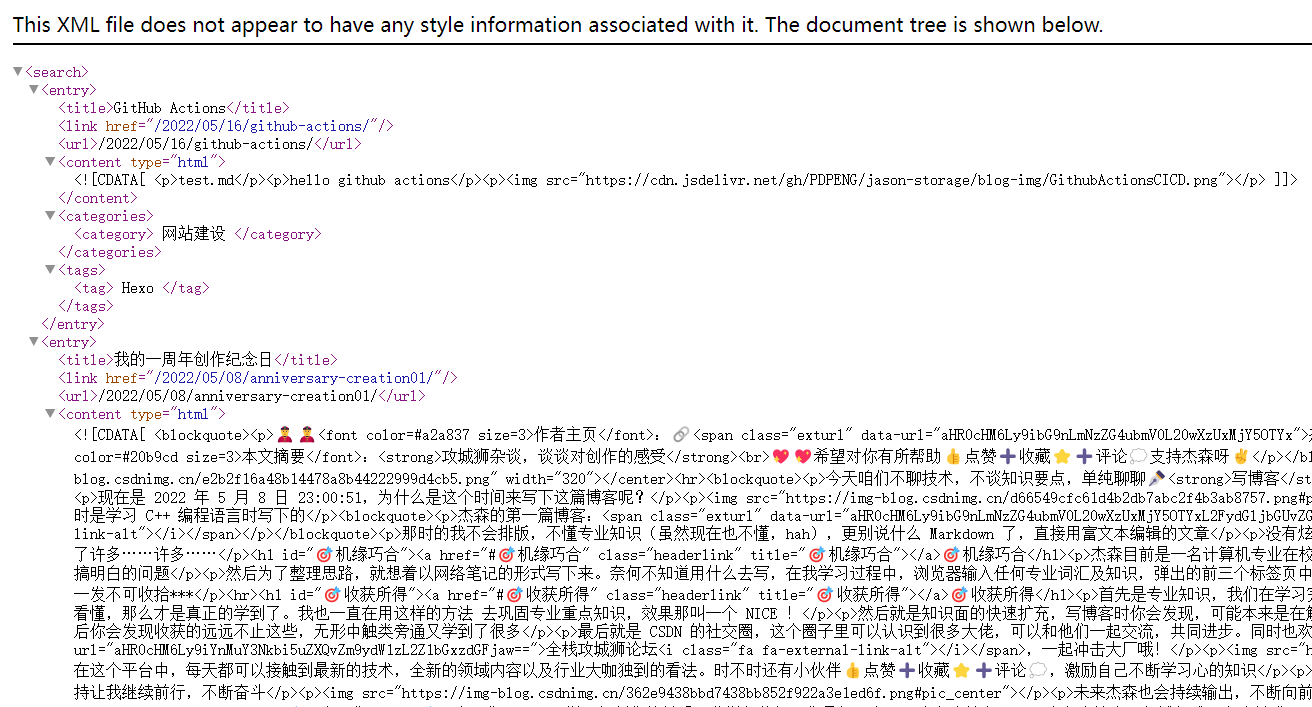
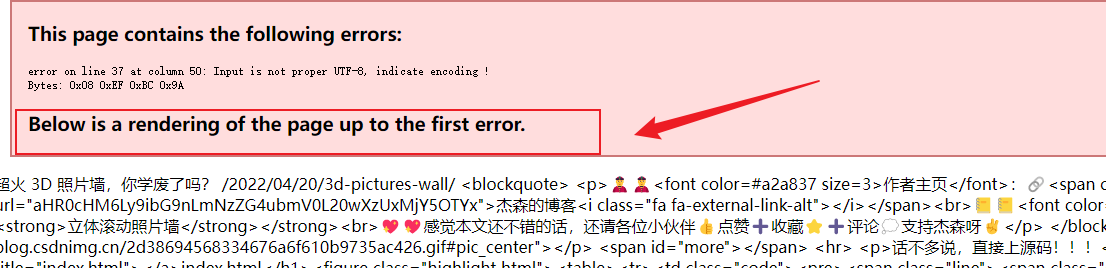
部署完成后,发现本地搜索功能失效,直接 访问站点 search.xml 浏览器显示
这里在保证插件配置正常的前提下,给出排除字符错误的解决方案
我们将 search.xml 保存到本地用 vscode 打开,根据浏览器报错的行、列指示,发现字符转义错误。在文章页面下删除该类字符后重新部署,搜索功能恢复
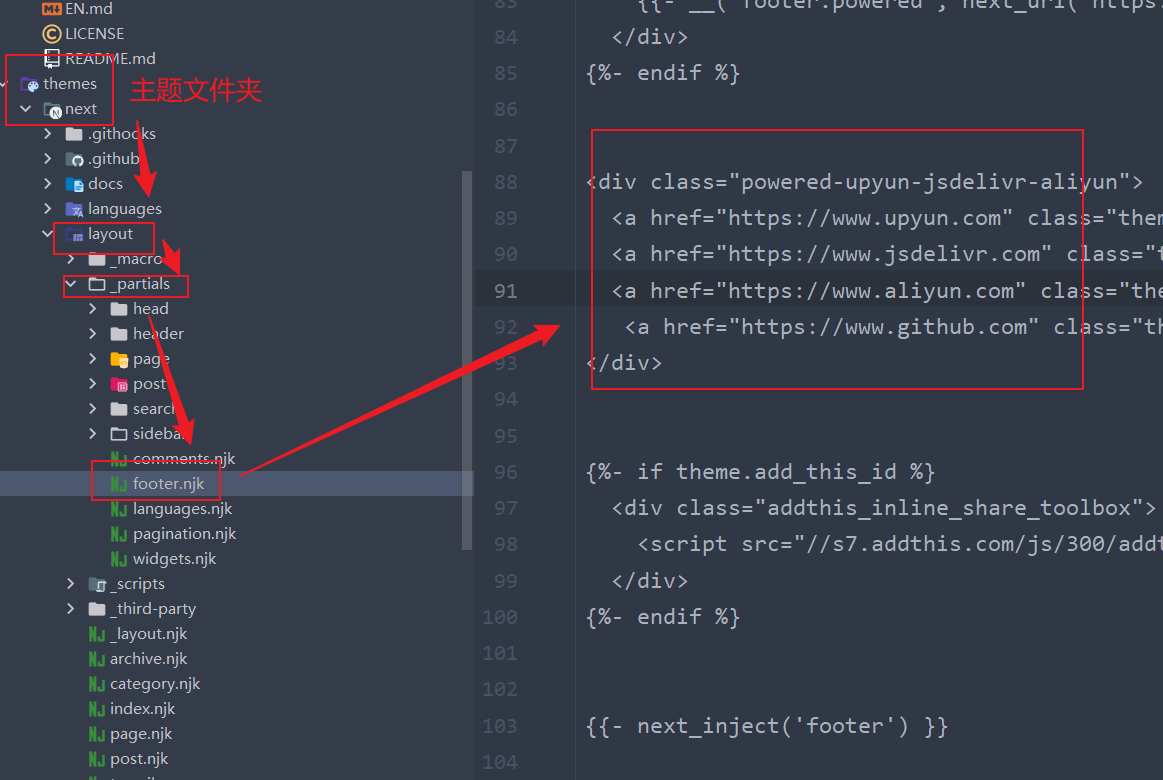
自定义站点页脚
效果图,预览地址
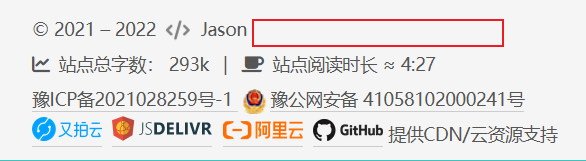
路径如图,按需修改
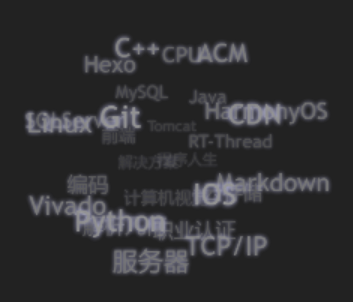
加入标签云
效果图,预览地址
- 进入到
hexo的根目录,然后在package.json中添加依赖:"hexo-tag-cloud": "2.1.*" - 然后执行
npm install命令
打开路径 next/layout/_macro/sidebar.swig,添加如下配置
1 | {% if site.tags.length > 1 %} |
- 完成安装和显示,可以通过
hexo clean && hexo g && hexo s来进行本地预览, hexo clean 为必须选项。 - *注:不要使用
hexo g -d 或者 hexo d -g这类组合命令,详见
项目地址及详细教程参考
README 转义问题
效果图,预览地址

当我们为项目配置 README.md 文件时,发布后会发现文件会被 hexo 转义成 .html 文件,详见 Hexo 配置
这里以站点添加中英双语介绍文件为例,将项目 README.md 及 EN.md 放在 source 目录下
然后在图示位置根据 glob 语法规则添加值即可
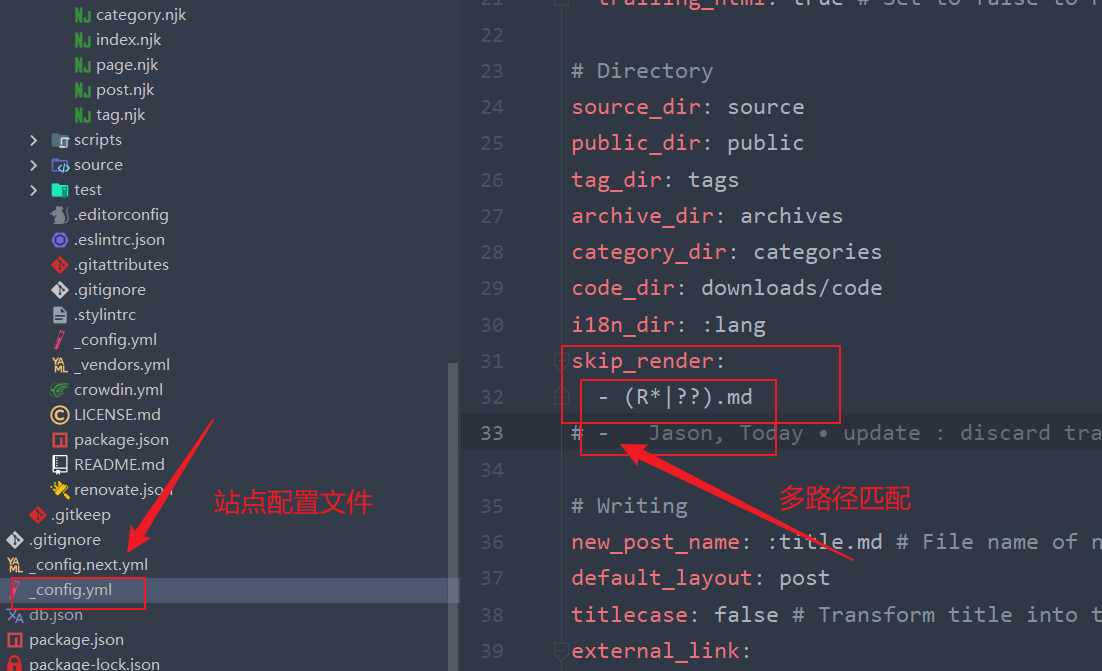
这样 hexo 就不会渲染匹配到的文件,显示正常
参考资料:
- GitHub Actions 自动部署 Hexo 01
- GitHub Actions 自动部署 Hexo 02
- Actions yml 文件示例
- GitHub Actions 入门教程
- CDN 方式添加看板娘 live2d-widget
- 本地搜索失效终极解决方案
- 命令行通配符教程
- Glob 语法及解析
- #extended-globbing